|
On one summer day at Flite Fest 2019... This is a story on how one serendipitous moment in time changed Nighthawk Gliders forever! Disclaimer: This article contains affiliate links to PowerUp Toys. If you choose to click them and purchase any of their products, you help Nighthawk Gliders receive a share of the sales! Thanks! Since 2017, Bruce and I have been attending Flite Fest (flitefest.com). It's an amazing multi-day festival hosted by Flite Test (a channel on YouTube) and is where you can camp, spend time with family, friends, and fellow hobbyists-- building, flying, and crashing RC aircraft. It is so much fun! Flite Test is a great YouTube channel and they started a business around foam board airplanes-- and then expanded it into a spectacular website and store at flitetest.com that covers a plethora of flying RC aircraft, kits, and accessories. (Not a sponsor! lol!) But, nonetheless, they are inspirational and I can look up to them as a fine model of and encouragement of success.
It was around 2018 where I was considering the possibility of starting up Nighthawk Gliders LLC as a company and website to sell CLG kits. I brought a few prototype kits at Flite Fest and decided to gift a number of them to the Flite Test crew. Heck, they were the first laser-cut editions and they didn't even include instructions on how to build them! I just wanted to thank the Flite Test family for hosting such wonderful events and I thought their families would enjoy flying them. I gave them one or two Sandpiper 18 CLGs and, to my surprise, Alex Zvada decided to feature us in one of their videos on their Flite Test YouTube channel.
I have always wanted to add some sort of power to my balsa wood airplanes (just for some fun) and I knew of the POWERUP product that uses a capacitor to power a prop that can be mounted on paper airplanes. It's a pretty cool concept, really. You get to design your own paper airplanes, clip on the POWERUP module, charge it up with a battery pack, and launch it into the air to see it fly. I published a couple of tutorial videos on YouTube to show you how to make a couple of paper airplanes I made back in my youthful days. I'm not certain if the idea of an attachable capacitor-powered prop for paper airplanes ever crossed anyone's mind back then.
Anyway, moving on to Flite Fest 2019. Bruce and I have a tent and we are camping to maximize our four-day festival-fun potential. Really, the weather was beautiful and it could not have been better. My routine would be to wake up in the morning , get a little coffee in me, and then spend some time flying my CLGs in the nice calm air. Later that evening, I would do the same just as the sun was setting. It was very common place that a few folks would take notice of my gliders and they were not shy to approach me.
Shai has been looking for a balsa wood model that would work with his new POWERUP 4.0 and he thought our gliders could easily be "Powered Up" and that maybe "we could do business in the future." I thought that was cool-- that a company like PowerUp Toys could be interested in the gliders that I was flying and that there was potential for a business venture. That couldn't possibly be true, though, could it? After feeling a sense of "unworthiness," I took it more as a compliment and quickly dismissed it as something that could possibly happen. Nonetheless, I was very pleased to have met Shai-- for the odds of us meeting, let alone attending the same event and camping right next to each other, was more than complete and utter happenstance! Small world, right? On the next day, I was strolling around the vendors area and realized that Shai had a booth setup for PowerUp Toys. On his table, he had a number of his products on display. There was, however, one curious item also on his table. It was a paper airplane. Now, that's not unusual since the POWERUP line of products is all about powering up paper airplanes. However, what was unusual was that I immediately recognized who designed that airplane.
I mentioned to Shai that I wanted to collaborate with Kyle someday-- but, at that time, we failed to get together even though Kyle lives only 20 minutes from me. Shai said that Kyle made that paper airplane that was on the table and that Kyle was just there to meet Shai as they were collaborating to make new paper airplanes for POWERUP 4.0 and also to publish a book.
Given the new POWERUP 4.0 and the fact that it now has twice the power of the POWERUP 3.0, it seemed fitting to have Kyle invent a new generation of paper airplanes! But, Shai wanted the POWERUP 4.0 to fly more than just paper-- he thought, why not foam board? In fact, Shai had some foam board experts in mind and was the reason for him to attend Flite Fest 2019.
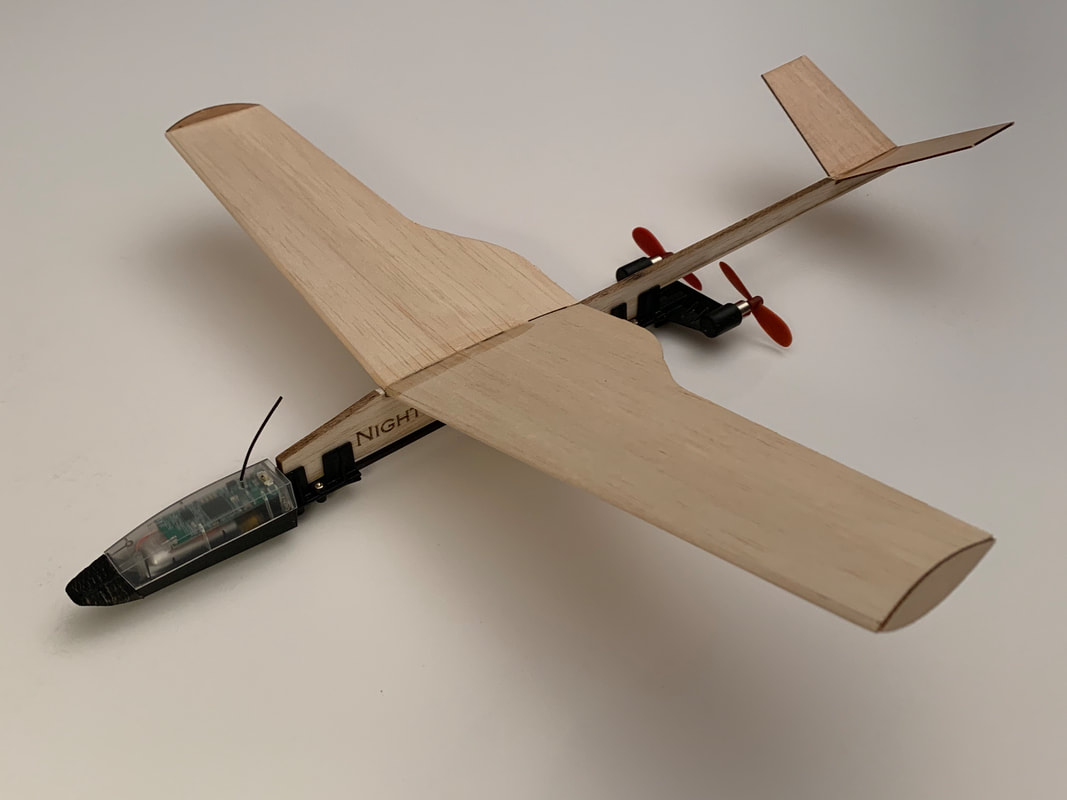
Shai's dream to fly almost anything with POWERUP 4.0 was coming true-- and balsa wood was no exception. He had previously experimented with some Guillow's kits and got them to fly with ease. But, now, he's seen our Nighthawk Gliders and he loved them. Before we all left Flite Fest, we exchanged gifts... Shai gave me a POWERUP 3.0 and I gave Shai some of our catapult gliders and then we went on our merry way. It was later that fall when Shai contacted me and said he was, indeed, interested in wanting Nighthawk Gliders to design a balsa wood airplane for POWERUP 4.0 and supply them with kits for his Kickstarter and Indiegogo campaigns. And so, of course, we totally agreed! Bruce and I brainstormed and we decided that our Tornado 12 CLG will be the basis for our new model. It just looks slick, fast, and cool-- a perfect candidate for POWERUP 4.0!
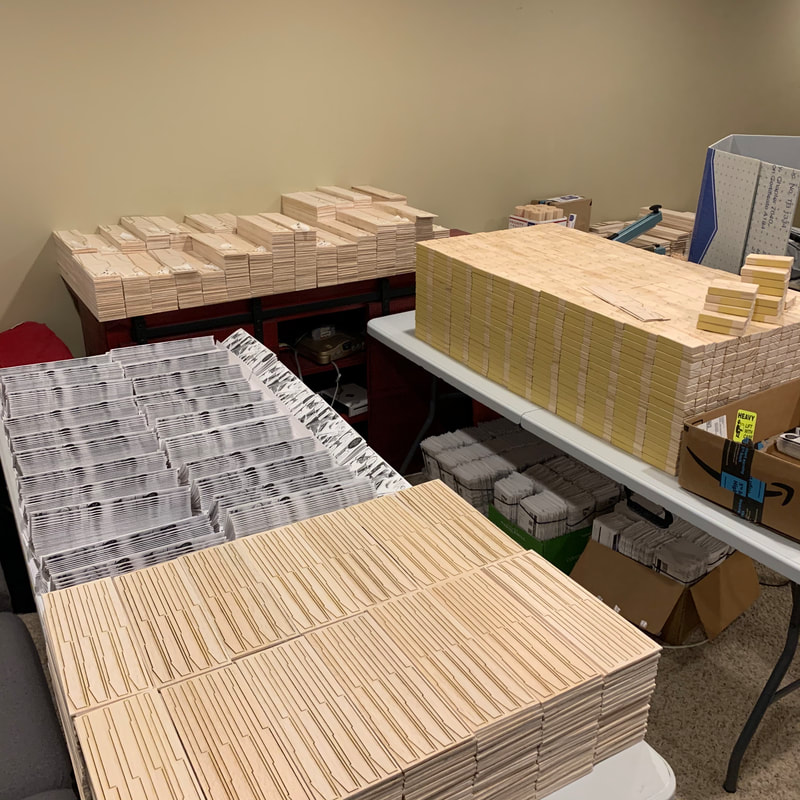
Since then, we've been pretty busy kitting a few thousand Tornado Updrafts and had little time to curate our YouTube channel-- but it's been fun and exciting to bring a new product into the world and it gave us something to do during the COVID-19 pandemic. Bruce even moved in with my family for a couple of months!
It really is incredible, when I look back on this one serendipitous moment-- how we just happen to be at the right place at the right time to catch the eye of one innovator who has so graciously invested in us to become a part of this wonderful journey so that we could bring new products to flight-lovers all around the world. We know a lot of people will enjoy POWERUP 4.0 for it is an amazing product. Also, we hope the Tornado Updraft 12 will bring happiness and joy to them as well! I'd like to give a special thanks to the Flite Test crew-- for they are knocking it out of the park and they are a great inspiration to many. If it weren't for Flite Fest, we would probably not be here today! Too bad about Flite Fest 2020 (which was cancelled due to the virus) but we are looking forward to Flite Fest 2021!
I'd like to give thanks to Shai Goitein-- for without his dreams of flying, without his spirit for innovation, and without his keen business acumen, we would all be in a different place today! I tip my hat to you, sir! And of course... we give a most warm and heart-felt thanks to our supporting customers-- for they are the most important people in the world! Thank you all! This, my friends, is why we enjoy flight and enjoy life (and we hope you do too!) Please fly safely and take care! Brad Nighthawk Gliders LLC
9 Comments
 In the beginning... When I was a teenager in high school, I dabbled in making balsa wood gliders. I was able to hand toss them, but I struggled immensely to make them into CLGs (Catapult Launched Gliders). For some reason, CLGs mystified me. Back in the day, the public library was all I could rely upon and it had but a few books to offer me. Therefore, I knew very little and didn’t have the resources nor did I have the time to research and experiment with them to make them work well as a CLG. Fast forward a couple dozen years and we have the wonderful world of the internet. With the advent of search engines, anyone can find some fantastic resources in the realm of free flight. YouTube was a goto for me and I spent hours searching for some of the best gliders anyone was willing to demonstrate flying. I found many CLGs, but surprisingly, not as much as I thought I would. My searches expanded to HLGs (Hand Launched Gliders) and DLG (Discuss Launched Gliders). I just watched them all in amazement as I envied in building some. From 2013-2016, I volunteered as a Science Olympiad coach. At first, I didn’t exactly know what I was getting into, but I always signed up for the building events which included helicopters in 2013-2014 and elastic launched gliders in 2015-2016. I was a noob and knew very little, but was determined to work with my students as we figured things out together. Embracing failure was one of my coaching strategies. Our rubber powered helicopters started off as heavy tissue models flying 25 seconds and by the time we made the Indiana State competition we had some nice lightweight produce bag models that flew 1m 30s and placed 3rd in both years. In gliders we also did well; improving our designs (after breaking many gliders) and upped our building skills as we went along. In gliders, we had some models flying 25-30 seconds and placed 3rd in state in both years! We were up against the best schools in Indiana who always made it to nationals— so, it was a really good show for us as “beginners.” However, from then on, I was bitten by the free flight bug! In the summer if 2016, I continued my passion for CLGs. I built many of them and experimented with many different designs. I didn’t have access to an indoor facility, so, I flew them outside. I built them as light as I could make them and quickly discovered they only flew great on perfectly-calm days. However, I was actually building indoor gliders which did not work well outdoors. So, I went back to the drawing board and made some outdoor models. They were a bit heavier, I was able to launch them higher, and they were more tolerable of a gentle breeze. From my uncountable number of failures, I finally had my Nighthawk model (a lesser known model) and my Sandpiper model flying well. By the fall of 2016, it was time to show them to the world! I fired up my YouTube channel and decided to call it “Nighthawk Gliders.” I thought the name was rather catchy and I didn’t want to publish videos under my own personal name. I wanted my channel to seem a little more “professional” and I wanted my gliders to have a recognizable “brand,” so to speak— which includes a logo, because… why not? My first videos were basically me demonstrating my gliders flying— nothing more than that. I barely knew much about video production. Perhaps my videos were not not that exciting unless you really appreciate what it takes to build and fly CLGs. It was content, nonetheless. Now that I had some videos, I needed to get viewers— especially those viewers who like this sort of thing. Not only did I want the views, but I wanted subscribers, too, of course! I needed to do more research on that topic and figure this YouTube thing out. Well, aside from my best effort at tagging the heck out my videos and hoping for the best that they would rank in search results, I figured if I wanted viewers, then I needed to be an avid viewer myself. So that is what I did. I found channels and videos I enjoyed watching— especially those related to airplanes and gliders— then, I commented on said videos. My comments were always positive, complimentary, and uplifting. It was important to me that my comments were always genuine and from the heart and poignant to the video I watched. I never asked anyone to come to my channel and “subscribe” for I did not want to “spam” anyone. I wanted my favorite content creators know that I am there, I’m supporting their creativity, and I’m always watching their videos. If they happen to be inquisitive about my channel, then they are more than welcome to naturally come and visit me. If I had content that they like (and my fingers were crossed) then they would naturally watch and subscribe. Likewise, if there were any other avid commenters on these channels, then they may see my comments and come visit me as well. It’s as simple as that— just pay it forward and never ask for anything. Well, that seemed to be a “simple” enough approach but it did take a lot of time and effort to grow Nighthawk Gliders organically— it’s still slow going, to be quite honest, but it is growing, indeed! Sometimes, a little boost from our YouTube friends helped, too. We’ve had a few “shout outs” from a number of notable channels we love to watch and they helped give us a decent boost in viewers/subscribers. Some of our YouTube fiends include: Grandadisanoldman, TheRCSaylors, Joshuafinn, FliteTest, and Doyle Blevins, to name a few. This may seem like a semi-random bunch of folks, but they all had a couple of things in common… 1) they all produced family-friendly content and 2) they enjoyed flight. Therefore, I am proud to call them our youTube friends. Viewership grew slowly, but I wanted to have some evergreen content— something timeless and useful to anyone who was interested in building balsa wood CLGs. I wanted to share what I learned and give back to the internet community. I searched hard for any decent tutorials that might be out there but found nothing of high quality. This baffled me. I know there are a lot of life-long free flight hobbyists out there, so why weren’t there any “how-to” videos? Were these pros keeping their secrets to themselves? Then I had to asked myself, If I were to produce a tutorial, would that be like a taboo— something akin to a magician revealing his secrets? Well, I decided to make my own 3 part series around the Sandpiper 12 and I wanted to show the world how I made it. My goals were: 1) Have easy-to-follow steps with a decent camera angle to show what is being done, 2) Have a model that was easy to build, inexpensive, and require little tools, and 3) ensure I have Closed Captioning for international viewers… even though it is in english, it helps to show what you are saying. Throughout the years, this Sandpiper 12 tutorial has become our most watched video series. We’ve gotten a lot of positive feedback and great stores in our comment sections and emails. We are pleased to help serve communities around the world by providing a simple project that is now being taught in schools all around… go figure, this is way cooler than I had ever imagined! As we continue to grow (and many videos later) we continue to collaborate with our many YouTube friends. We are blessed to have acquired such good friends and they have been positive to our cause and willing to help us along the way. One acquaintance sold us his small laser cutter (thanks, Foamie Ninja) and with that, Nighthawk Gliders quickly became an LLC in January of 2019. We are now creating CLG kits and build plans to sell locally in craft shows and online. It’s just the beginning! NighthawkGliders.com/store So, where do we go from here? Well, my brother Bruce and I want to continue to produce some fun products and share them with the world. We want to explore some fun and exciting new business opportunities. We want to grow as a company, produce more entertaining videos for our YouTube fans and give back to the community. Finally, we want to encourage everyone around the world to join the hobby of free flight and build something! There is a reason why our slogan is “Enjoy flight & enjoy life”— it’s because we truly believe in it and we want you to believe in it, too! As we come to a close of 2019, we cannot thank you guys enough for sticking around with us and following us along on our journey. We absolutely appreciate your feedback and support (which helps us out immensely.) Without you, we certainly would not be here today! Enjoy flight and enjoy life, my friends, and have a happy new year! Brad 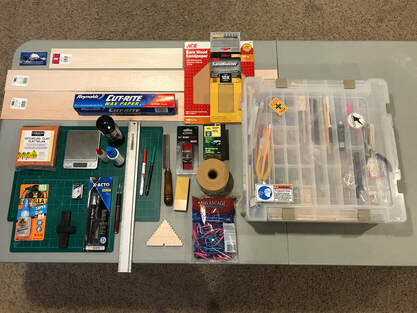 The items we use to build our balsa wood gliders from scratch! The items we use to build our balsa wood gliders from scratch! Hello, everyone! We have had questions regarding the tools and materials we use to build our balsa wood catapult gliders. I would like to give you an overview of the items we use all the time. Below is a fairly comprehensive list, some essential and some not so essential. The great thing is, it really doesn't cost that much to get into this hobby. You should be able to find the handful of tools and materials you need, a with a few sheets of balsa, you're off and running! So, grab a cup of joe and let's go! Workspace First and foremost, you're going to need a good place to work-- preferably somewhere you will have plenty of elbow room for a dedicated workstation. I have allocated space in my basement which has a nice environment for building. It has plenty of overhead lighting and a nice comfortable atmosphere. Since I am in the basement, I have a dehumidifier which serves the main purpose to keep my basement dry and it serves a second purpose to also helps to keep my balsa dry. Maybe you don't have a basement. Perhaps, you have an area in your family room or a guest bedroom in your house you can take over. Maybe, the garage or even the dog house is your only option. Whatever the setup, be sure it's in a safe location, away from rambunctious pets, and very curious (and grabby) young toddlers. We wouldn't want them getting into the super glue and sharp knives, right? (Ok, strike the dog house idea, that is a horrible option as a place to work.) 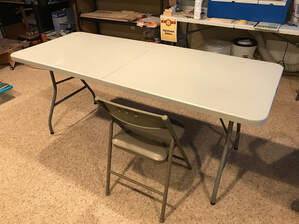 A great work table A great work table Table You need a fairly sturdy table-- one that is spacious and flat. You're going to sand your wings on it so it needs to be strong with no wiggly-jiggly or wobbly-bobbly legs. It is important for it to be a dedicated work table and it certainly should NOT be your nice dining room or kitchen table. I recommend getting one of these plastic banquet tables. I purchased a six-foot table from Target that cost me around $40+. What's great about these tables is that they are pretty sturdy and they fold and store easily. Plus, if anything bad happens to it, it's a work table... so, your mom will be happy you didn't destroy the dining room table, your dresser, the wooden floor, or anything else! So, heed my advice or you might have to evict Fido from his dog house as your place to work! 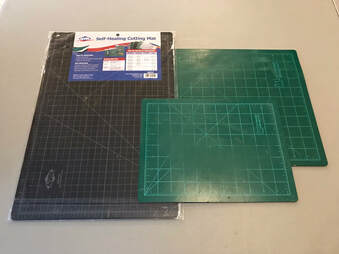 My new and heavily used cutting mats My new and heavily used cutting mats Cutting Mat Ok, now that you have your nice (inexpensive) table to work upon, you'll still want it to last a long time. A cutting mat is essential as it protects your table from sharp blades and it protects your blades from the hard table surface. Since I make a lot of cuts that are 12 inches long, I prefer cutting mats that are at least 18 inches long to give me plenty of room to work upon so my knife is always cutting on the mat. They come in various sizes and can be found at your local hobby and craft stores. Find a size that works for you and one that fits your budget! 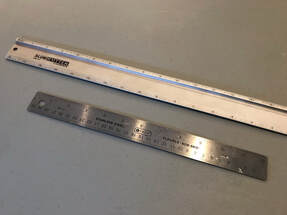 Non-slip metal rulers Non-slip metal rulers Metal Ruler (Straight Edge) A metal ruler is going to serve as two tools in one. It will be your primary measuring device and your guide for making straight cuts. Here are the three main important features of a good ruler: 1) It should be made of metal! This is very important if you are using it as a cutting guide. It will be more durable and your blade will not harm it. 2) Find one that has both inches and centimeter scales. This makes it much more versatile... you know, just in case the U.S.A. decides to go metric. (Yeah, right! That'll never happen!) And finally, 3) Find a metal ruler that is completely flat with something soft on the back side (e.g. rubber, cork, or foam.) Why? Well, when you lay the ruler on your balsa wood and apply pressure to hold it in place, it will stay in place during your cutting. I have an 18-inch ruler and it has served me quite well. Remember, the saying, "always measure once and cut twice" -- er... wait, what?... That's not right... reverse that! 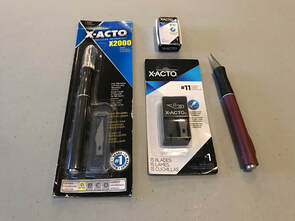 X-ACTO X2000 with #11 blades X-ACTO X2000 with #11 blades Hobby Knife Here you have a wide variety of choices for cutting implements and, in the end, it comes down to personal preference. Some factors in play might vary from how it feels in your hand, how it performs when it cuts, and/or the cost of the tool and blades. For me, I like a good hobby knife over a utility knife. I really like the X-ACTO X2000. It is inexpensive (less than $10) and it has a very nice thick rubber barrel (handle) that fits nicely in my hand. You can certainly find cheaper X-ACTO type knives with the thinner metal handles, but I like comfort when I dangerously wield knives. I use the standard No. 11 blades which have a very pointed tip-- which is great if you have to make curved cuts. Or, if you like, a simple utility knife can get the job done. The popular ones have the retractable blade where you can break away the tip to get a new sharp edge. I know other hobbyists who prefer just a simple single-edged razor blade. Note, this is NOT the same as double-edged razor blades! (Trust me, you'll only make that mistake once... and now, I can only count to 9 before I have to take off my shoes.) Whatever knife you choose, be sure to be cautious and always use a sharp blade-- for you may be risking injury when using dull blades! 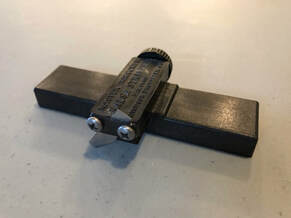 My favorite tool! My favorite tool! Balsa Stripper (Balsa Strip Cutter) If there is a favorite tool in my arsenal, it's gotta be this one! I love this thing and I will say, hands-down, this will save you time and money! So, how does it work? It has its own adjustable guide and cutting blade that you use to cut off strips of balsa (up to 3/4 inch wide) from a sheet of balsa (up to 1/4 inch thick.) Sure, if you need strips of balsa pre-cut, you can find those at the hobby shop, but you will pay a premium price for each strip. However, it's way cheaper to buy a larger sheet and cut your own strips. This tool is perfect for cutting fuselage strips! You can find these at your local hobby shop (or online) for about $10 or less. The most common brand is "Master Airscrew." (Tip: If you decide to search for this item on the internet, please remember that "balsa" is a critical keyword you must include in the search bar-- I'm just saying because I do not want to be responsible for your internet search history.) 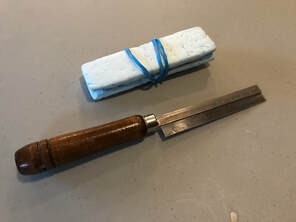 Yeah, my razor saw is a bit rusty. Yeah, my razor saw is a bit rusty. Thin Razor Saw Balsa can vary in thickness and in density, and when it comes to cutting dense balsa (or in a cross-grain direction) it can be a bit challenging. Therefore, instead of using your hobby knife and making multiple cutting passes to get through it, a razor saw may do the job much better and quicker. If you get one of these, I recommend one that has a lot of teeth per inch. I think the one I have is around 52 TPI. If you have fewer teeth, the balsa may have a tendency to crumble underneath the blade and not cut easily. The key is understanding how the teeth are angled. They mainly cut on the pull stroke, so when I start a cut, I gently apply a couple of push strokes to score the wood. This ensures my cutting groove is started before applying both push and pull strokes. Anyway, you can find these at your typical hobby stores and they'll probably cost you $12+ dollars. For some reason, they do not come with a blade protector! Seriously, what's up with that? Is it too much to ask? Sheesh... I use some scrap styrofoam to cover my razor saw blade when it is in my toolbox. 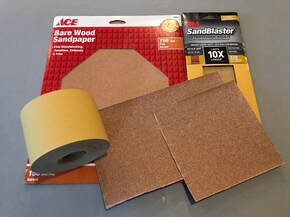 Sandpaper of various grits Sandpaper of various grits Sandpaper When working with wood, you're going to need a way to shape your airfoil and sandpaper works easily with your balsa material. Sandpaper can come in different sheet sizes (mainly to fit different size tools and sanding blocks) and it comes in a wide variety of "grit." The grit is a number (e.g. 80, 100, 150, 320, etc.) and it represents the size of "sanding particles" that's on the paper. The smaller the grit, the bigger the sanding particles and the higher the grit, the finer the sanding particles. The typical sanding process is that you use a lower grit to sand away the material more quickly (more roughly) and then you work your way to a higher grit to achieve a progressively smoother surface. But, I'll be honest with you, when it comes to me building my small 12-18 inch balsa gliders, I just use the 150 grit. I seldom go a second round with higher grit. Also, if you use 80-100 grit, you run the risk of over sanding, and before you know it, you'll have messed up your airfoil. The hardware store might be your best bet for sandpaper (e.g. Menards, Lowe's, Home Depot, Ace, etc.) So, shop around and find what works for you. I have even recently shopped Amazon and splurged on a roll of good 150 grit sandpaper that has a sticky backing-- I love that stuff and it's great for my homemade sanding blocks... which is our next topic. 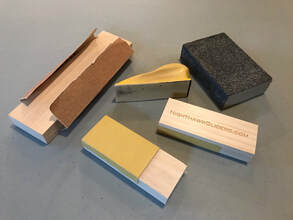 A number of sanding blocks A number of sanding blocks Sanding Block I would strongly suggest that you do NOT sand your airfoils without using a sanding block. Don't even try unless you desire an inconsistent thickness across your airfoil. A sanding block will provide you with the rigidity you need for a consistent and level sanding stroke. So, before you get some sandpaper, think about the sanding block you will be using. Me? I like using the simple tried-and-true block of wood. I'll wrap my sandpaper around it and it's a done deal. I cut my own blocks from select pine. Since I work mainly on small gliders, I like my sanding block to be light and small. Now, if you search the hardware store, you'll see a wide variety of sanding blocks; many of them are rather large, heavy, and a bit unwieldy for detailed work. Also, you may find some of those "foamy" type sanding blocks. Just be aware the foam blocks can flex if you push down too hard on them. A solid block is the better choice. Or, you can just make your own, like I do. 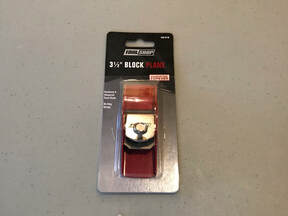 Apparently, I'm not using this one yet! Apparently, I'm not using this one yet! Small Block Plane In my opinion, this tool becomes helpful for larger, more ambitious projects-- say for those airplanes you build with a wingspan greater than 18 inches or you need to shape an airfoil that is 1/4 inch thick or more. What does it do? Basically, it whittles off paper-thin strips of wood one stroke at a time by using a sharp steel blade. It's faster than sanding, but to be honest, it can take a little getting used to. The problem is that you can easily shave off too much material accidentally. So, you need to be careful using it. Once you get the hang of it, it becomes easier to use. After using this tool, you'll still follow up with a light sanding session. This tool is found in hobby shops and in some hardware stores. 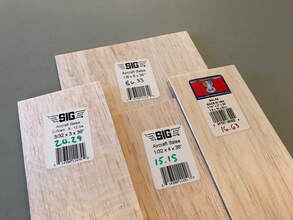 Popular in the USA are Sig and Midwest Popular in the USA are Sig and Midwest Balsa Wood When building aircraft, balsa is the wood of choice. It's such a fantastic material... however, finding quality balsa can be frustrating at times! I must warn you, especially if this is your first quest searching for good balsa, it matters a lot where you get it and it matters even more in what you select from the bins. First off, save yourself some time and go directly to your local hobby shop (such as Hobbytown USA) and avoid the "craft" type stores (such as Michael's, JoAnn Fabrics, or Hobby Lobby.) Nothing against the "craft" type stores in general, but when it comes to balsa, they often have a limited selection, their product is typically more expensive, and the stuff on their shelf is often damaged due to slow product turnover. The best hobby shops have lots of bins of neatly-stored balsa and a frequently replenished stock. Next, you should pay attention to the quality of wood. You'll want good, flat sheets having a consistent wood grain across the whole sheet. This is important for a well-balanced glider. I'll hold it up to the lights and inspect the wood grain for consistency. Finding the appropriate density and understanding wood grain will come with experience. In fact, i'll have to consider publishing another blog on this very topic! You could also order your balsa online from a major supplier (such as Sig Manufacturing for example) but, you will certainly pay shipping cost unless your purchase a huge bulk just to get the free shipping. Good luck on your quest! 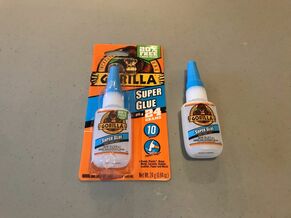 Future Sponsor... I can dream, right? Future Sponsor... I can dream, right? Super Glue (Cyanoacrylate) Now that you have all your parts cut out and sanded, you'll want to use good old fashioned Elmer's wood glue to assemble your airplane. Naaa... I'm just razzing ya, we don't have time for that! Thanks goodness for Super Glue (aka CA Glue or Cyanoacrylate) because it is an "instant" set adhesive that works great with balsa. However, if you go into a hobby shop and look over the CA glue selection, you might just scratch your head because there's thin, medium, thick, and gel-- "what's the difference," you ask? Plainly put, the thinner the adhesive is, the quicker it dries. The thicker it is, the better it is in filling "gaps." In short, I find medium CA glue to work best on my balsa airplane projects. In fact, I would even say that the Gorilla brand Super Glue is my favorite. You can conveniently find Gorilla Super Glue in hardware stores and even in some grocery stores for $5-6. However, when comparing prices, pay close attention to the Net Wt. in grams per unit cost. For example, I've seen the Gorilla Super Glue bottles come in 15g, 20g, and (20% more free) 24g sizes. Just pay attention that the physical size of the bottle is the same regardless of the quantity of adhesive within them! Post note: Gorilla is NOT a sponsor-- so, I just wanted to clearly state that here. I mean, you know, if they wanted to be a sponsor-- like if they asked us or something-- sure, we'd give it some thought. It'd be nice to have a good sponsor, right? Hey, Gorilla, if you happen to be reading this, please, please, please be our sponsor! ;-) (um... sorry about that, folks... and now back to our regularly-scheduled blogging...) 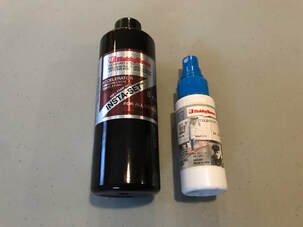 CA Accelerator in spray and refill bottles CA Accelerator in spray and refill bottles CA Glue Accelerator Even though CA glue sets very quickly-- as in a matter of seconds-- it may take hours to fully cure. That's where the magic of CA Accelerator comes into play. It works on adhesives that have "cyanoacrylate" as an ingredient. If you're just building an airplane or two, I'll be honest and say CA accelerator is NOT a mandatory product to have. Unfortunately, it's a bit costly and is not worth it if you just have a couple of projects. But if you are a hobbyist and you build all the time, then this stuff is great! After gluing your parts together, you just apply a drop or two of CA Accelerator and it fully cures in a matter of seconds. At the hobby store, a small 2 oz. spray bottle might cost around $5 and a large 8 oz. (refill) bottle around $15+. Another tip: If you don't have CA accelerator, just use your humid breath and breathe on the glue joint for a while. The humidity will help accelerate the drying time. 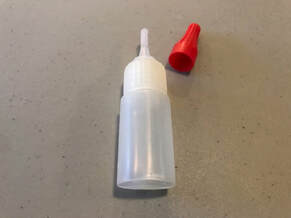 Squeeze bottle for CA Accelerator Squeeze bottle for CA Accelerator Squeeze-Bottle w/ Tip Applicator Ok, this is also an item that is not technically essential, but I do recommend it because I am NOT a big fan of the CA accelerator spray bottle. When I spray that stinky stuff on my glue joints it goes everywhere-- on my fingers, on my table, in the air, and I mean everywhere! Therefore, it's a good idea to find a good little bottle with a fine tip applicator, fill it up with the CA accelerator. That way, you can apply the accelerator more precisely by placing a drop or two on the glue joint. You can find other types of bottles with a fine metal tip, but what I have works just fine. Also, for some reason, these little bottles are more expensive than they should be! Why? Well, I think after you breathe this odoriferous CA accelerator for the first time, you quickly realize $10 for a bottle might be an appropriate sacrifice. I suppose that's how they get ya. Perhaps, in the end, it may have paid for itself since I'm no longer wasting so much accelerator by spraying it on everything else but my project. Trust me! When it gets on you, it does not double as a good cologne! 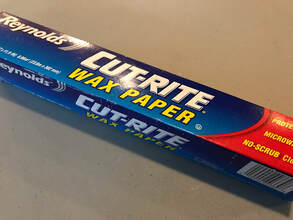 A good brand of wax paper A good brand of wax paper Wax Paper Pretty much without fail, super glue will undoubtedly fuse your fingers together faster than you can blink an eye-- after all when super glue was invented, it was used on the battlefield to quickly close wounds. History aside, it does have a weakness and that weakness is your everyday common wax paper. Since super glue will not stick to that, it becomes the perfect protective layer between your freshly-glued project and your table. Sure, you'll still glue your fingers together, but at least your project will not stick to the table! For that alone, wax paper is a MUST have and should ALWAYS be used while gluing parts together. Most hobbyists know this fact, but just in case you didn't, you're welcome! Just stick with the better quality brands and you'll be fine. I once purchased a cheap brand that was a bit skimpy on the wax coating-- so, beware. 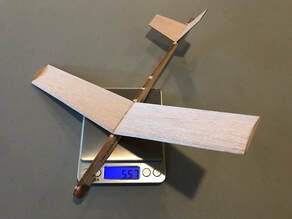 Nice scale with back-lit lighting. Nice scale with back-lit lighting. Digital Scale Alright... moving on-- The next useful item is a digital scale to measure weight. Again, perhaps a non-critical item to have... however, if you are building lots of gliders, or if you are building for competing, it's good to know the overall weight of the airplane parts and also the final weights of the gliders. If you search Amazon, for example, look for "digital kitchen scales" and you'll find a boatload of them to choose from. You can find some fairly inexpensively and I especially like those that can measure to a 1/100th of a gram. I think when I bought mine, it cost me around $12. You can weigh the option of buying one or not and decide for yourself! (See what I did just there? Sorry, that was punny!) 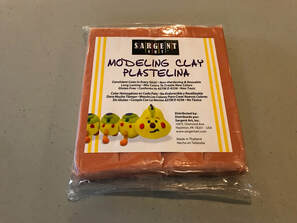 Non-hardening modeling clay Non-hardening modeling clay Modeling Clay (Plastelina) For the nose weight on our gliders, we like to use Plastelina-- which is non-hardening modeling clay. This stuff is very easy to work with and you can add or remove clay from your model as you see fit. I always have a little plastic container of this stuff in my pocket when I'm flying my gliders or I'll have some stuck to my launch handle in case I need to make a CG adjustment on my glider. To be honest, there is a downside to this stuff. It's temperature sensitive. The hotter the day, the softer and sticker it gets-- especially if it sits in the direct summer sunlight. But, what ev's... Keep them shaded and they'll be fine. You can purchase this stuff by the pound for around $4 or so... which is a LOT! I get this at a local supply store called United Arts & Education, I think you can also find Plastelina in the typical big box stores and most likely online as well so search around. 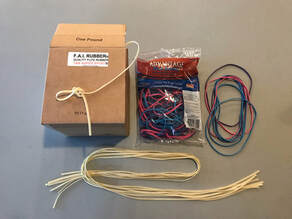 Rubber bands for catapult launchers Rubber bands for catapult launchers Rubber Bands When we launch our catapult gliders outside, we use rubber bands that are 1/8 inch wide and we have a couple of options. Typically, we use some 7-inch long file band loops as our default go-to. The product we use is the Alliance Advantage brand Rubber Bands #117B and you'll find them at Walmart for less than $4. These are just office file bands and bag of these has an assortment of three fun colors: blue, pink, and purple... because, who doesn't need a little color in their life? But, when we really want to push our gliders to the limit, we'll use the premium hobby-grade stuff: FAI Tan Super Sport Rubber. We'll make a launcher with a double loop 9 inches long and that will make our gliders sky-rocket! I highly recommend visiting the Volare Products website (volareproducts.com) as the place to purchase some FAI Tan Super Sport Rubber. Now, if you are building a glider for indoor flying, 1/8 inch is way too thick... try something smaller like 1/16 inch. You'll have to experiment based on your glider weight and ceiling height to find the best fit. On a side note: If you are building rubber-powered (wind up) airplanes, you gotta go with the FAI Tan Sport rubber because the file bands will not work at all! 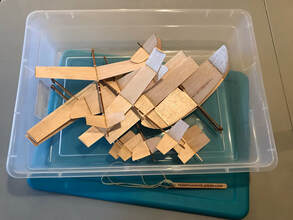 A well-organized tub-o-gliders A well-organized tub-o-gliders Storage Box Now that you have your gliders built, you might want a nice way to carry them to the park or you need a good sturdy container to store them for safe keeping. There's nothing simpler than a plastic storage container. I gotta say my favorite is the Sterilite brand 28 Qt. container-- it's 23" L x 16 1/4" W x 6" H. You can easily throw in six or eight gliders in there. Also, since we often fly into the early evening hours, dew can start to drop. Therefore, these plastic containers are crucial in keeping our gliders well protected from the dampness. Search your local hardware stores and find these or something similar that works for you. I actually found some at our local grocery store, Kroger, for about $8. A good investment to protect your precious gliders! 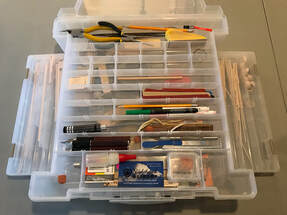 My not-so-organized toolbox My not-so-organized toolbox Toolbox Ok, the last thing you may want to consider is finding yourself a handy-dandy toolbox that can hold all of your building gear. You'll be a happier person if you can have a tackle box, a storage box, or anything to keep your things neatly organized. I searched and searched to find the best box I could find... and lo and behold, I found this gem of a box! Luckily, I found it at JoAnn Fabrics many years ago and I think it may have cost me $40-- so, yikes! But in hindsight, it is well worth it! I love this thing and the many-many adjustable compartments it has. I'm curious if it still available in the store? Hmm... I doubt it is. Anyway, I'm not the most organized person by far so I just randomly toss all my junk in the box. Every time I look at it, it gives me a guilt trip about how completely unorganized of a person I am. (Sigh!) In Conclusion...
The handful of things that you really, really need are...
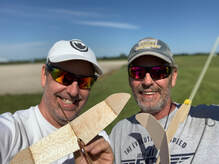
We hope you have a great time building and flying your balsa gliders and if you are interested in building our Sandpiper 12 CLG from scratch, check out our easy-to-follow video tutorial here: www.nighthawkgliders.com/build Enjoy flight and enjoy life, my friends! Brad Hello, Friends! Welcome to Nighthawk Gliders! We are very excited to announce our new website! Thank you so much for stopping by and visiting us. If you are interested in "enjoying flight and enjoying life," then this is the place to be! I suppose an introduction is in order... yes?  In this picture we have the Williamson brothers. I am the scruffy guy on the right, Brad. The other scruffy guy on the left is my brother Bruce. On September 15th, 2016 we decided to enjoy flight and enjoy life by starting a YouTube channel and website called "Nighthawk Gliders." Why did we start Nighthawk Gliders?
Well, we did so initially to have some fun and show off our fun-flying balsa gliders... But, we quickly realized our channel can serve a better and even bigger purpose. Instead of just "showing off" our creations, we want to inspire others in building their own aircraft. Therefore, not only do we want our channel to be fun and entertaining, but we want it to be informational, resourceful, and educational. Are we experts? No, we are NOT "experts," not by any stretch of the word. We do NOT have a Ph.D. in Physics, we are NOT engineers, and we've never contributed before to the field of aeronautical engineering. For the most part, we're just a couple of guys who strongly believe that learning NEVER stops after high school or college and we enjoy a hands-on approach to solving problems. At a minimum, we hope to acquire some knowledge in this field, we want to share and teach you something new! What will you find here and on our YouTube Channel? 1) First and foremost-- you'll find family-friendly content. Our channel appeals to folks of all ages. We inspire the younger kids to watch us and learn something new about flight. We also encourage the "older kids" to share and watch our channel with their children and/or grandchildren! 2) You'll see a showcase of our creations and watch us flying them. We're always learning and experimenting with new designs, improving flight endurance, and tinkering with performance. That's just fun for us! All in all, I know we're all just standing upon the shoulders of giants. But, we are starting on the ground floor here and learning the basics-- and we hope to work our way up to becoming experts in this field. (And boy, do we have a long way to go!) 3) You'll find some detailed tutorials on how to build some of our gliders. Yeah, we're spilling the beans on our techniques. We encourage everyone to join us, learn something new, and try building something fun today. We hope our video tutorials can be useful for everyone, including schools, clubs, and/or educators. 4) You'll enjoy some silly-fun entertainment. Part of the fun on our channel is coming up with new and exciting ways to enjoy flight and enjoy life. Bruce and I are competitive-- we like to challenge each other with newly inventive and exciting games. Have you ever lost a glider in a thermal? Can your glider hit a target? What is your craziest design that flies? It's all about being inventive, having some fun! 5) And finally, you'll see us doing collaborations and making new friends with those who share a common interest in this hobby/sport of flight. There are a lot of people out there who are enjoying flight and enjoying life-- and that is awesome! Please subscribe to our YouTube channel, join our community, and feel free to participate in our discussions. As we live and learn all that is joyous about flight, we are looking forward to providing you with helpful videos, information, resources, blogs, etc. We also encourage you to join us and share your learning experiences with us. Will you participate in our discussions and share with us what you have learned too? Are you willing to show us your successes and failures? Let's all fly together and solve some challenging problems. We think this is going to be fun and exciting time for everyone! Well, thanks again, for joining us here at Nighthawk Gliders! Until next time, my friends... Enjoy flight and enjoy life. Brad & Bruce Williamson |
Details
AuthorBrad Williamson, co-creator of Nighthawk Gliders, enjoys learning about the many aspects of flight and aeromodelling-- especially when it involves free-flight gliders made from balsa wood. From 2012-2016 he helped coach Science Olympiad teams for a local middle school. In the state of Indiana, his students placed 1st in rotor egg drop, 3rd in Balsa Gliders, and 3rd in Helicopters. Since then, Brad was hooked on building and flying things made from balsa. His contributions here stem from his love around the hobby of flight and his desire to be creative and share information. Along with his brother, Bruce, their goal is to inspire a new audience (be them young or old) to simply "enjoy flight and enjoy life!" Archives
August 2020
Categories |
 RSS Feed